How to Tune an Amp with A Multimeter? A 2-Minute Process
The quality and impact of sound through the audio setup in your car don’t necessarily depend altogether on how top-notch and expensive the gears you have installed.
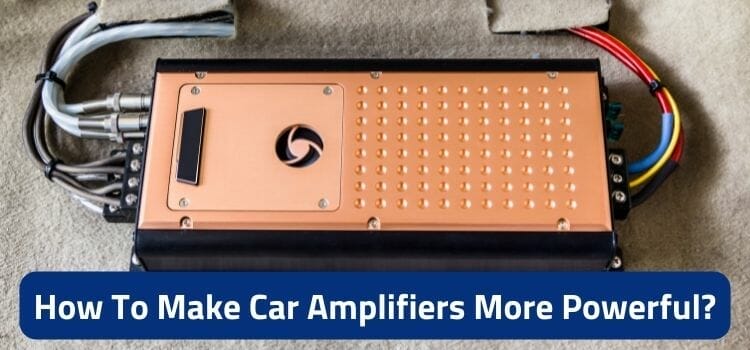
More than half the share thereby is held by how well each of the components is tuned up (esp. the amplifier).
A well-done amp tuning is the key to a perfectly optimal listening experience be in it a car or in a home theatre. Now calibrating the amp gain is either done by the layman’s technique of discerning through ears or via a multimeter or an oscilloscope.
The first of the three methods might never be as verily authentic, whereas the oscilloscope may be quite a lot of extra cost and strife. So tuning or testing an amp using a multimeter is seemingly the most apt way to do the trick.
Now how’s it done and what tools, techniques, and steps are involved in the process – the detailed guide below has got you covered comprehensively. So perk up and keep scrolling down.
How to Tune an Amp with a Multimeter?
Tuning the amplifier simply means deciding on an appropriate level of gain and frequency crossover out of it so that the input/output voltages are perfectly squared off. And using a multimeter is one effective way to get this job done.
Here’s in detail how the overall process goes step by step.
Keep in Mind
Before we start the process, remember, that the amplifier we’re gonna calibrate below is supposedly a monoblock amp with just one speaker connected to it.
Whatever (A to Z) steps you’ll go through down the road are meant for a solo speaker-amp calibration only.
For multiple or multi-channel amps and, of course, multiple speakers, you’ll need to redo all the steps from start to end individually for each speaker and its amplification channel.
Anyway, let’s begin the expedition.
Preliminary Arrangements
First thing first, make sure you have all the tools and apparatus in place. For example:
- A multimeter (preferably a digital multimeter)
- A small flat-head screwdriver
- The amp and speaker, of course
- A sinewave test tone
- Maybe a calculator
Find the Amp’s CEA Rated Wattage and Speaker’s Impedance
Apart from all that, see if your amplifier’s manual guide is placed somewhere within reach, and the speaker’s label (with all its tech details) is also intact. You’ll need both of them to check out the recommended wattage of the amp and the actual impedance of your speaker.
You can also find these details online by searching the make and model of your components through the internet. While the amp’s CEA-rated wattage is almost the sure-fire figure, the speaker’s genuine impedance can be manually checked via a multimeter too.
For that, unplug the speaker from its power source > set your multimeter’s knob at Ohm’s settings (preferably the closest where the speaker’s nominal impedance may lie) > put the red probe on the speaker’s positive and the black at its negative terminal > you’ll get the exact figure.
You’ll need to round that figure off to the closest whole number i.e. if the multimeter reads 1.7 or 1.8, read it as 2. If it reads around 3.6 or 3.7, it means 4 Ohms. Nonetheless, speakers usually come with a nominal impedance of 2, 4, 8, or 16 Ohms.
Now, let’s move to the real deal.
#1. Determine the Proper Gain Voltage
Tuning is all about balancing the in/out voltage of the amp so that there are no distortions (audio clipping or speaker overpowering) of any kind. So ideally the first step of the process is to find the apt amount of AC voltage required.
For that, we’ll be using one of the variations of Ohm’s law i.e. V= P X R
Where V represents the desired AC Voltage
P represents the amp’s wattage – CEA-rated or user-guide-recommended
R represents the speaker’s resistance – labeled or manually checked via multimeter
Now, suppose your amplifier is rated at 200 watts for 4 Ohms, whereas your speaker’s impedance also reads 4 Ohms, so here’s applying the formula:
V= 200 X 4
V= 800
V= 28.28
So, you need to set your amp’s gain to approx. 28.3 volts.
#2. Unplug it All and Put the Gain and All Other Filters to Zero
Unplug all the connected accessories from the amplifier (but it’s better to take a snap beforehand so that you’re sure about correctly redoing them later). Leave only the amp connected to the power source.
Next up, tweak the amplifier’s gain and all the equalizer settings including bass, treble, bass boost, loudness, crossover, processing, etc. to absolute zero (0) to achieve the maximum bandwidth out of the test tone you’re about to play.
Varying Test Tone Frequencies
Before you play the test tone, make sure it’s perfectly in the region of the speaker (in case). While tuning the amp for a sub, the test tone should be around 50Hz. Whereas for mids or highs-intended amps, aim for frequencies of around 100Hz and 1KHz, respectively.
Anyway, test tones to set speaker gains for varied drivers are ready-made and available online, and all you need to do is just download them to get the job done.
#3. Turn the Volume Up to 75% and Play the Sinewave Test Tone
Once you have the tone ready to play, start turning your factory stereo’s volume up until you feel distortions coming to life. Just there, tweak it back down a little bit to where you feel no distortions of any kind and just pure, clean, and clear sounds altogether.
In most cases, that threshold lies at around 75% of the volume going up the stock radio and around 90% for the aftermarket head units. You should never go above these levels once you’ve tuned the gain; strolling anywhere below is always OK.
#4. Connect the Multimeter to the Amp
Set your multimeter’s knob to the AC Voltage (ACV or V AC or V ~) region. Place it at the voltage that’s seemingly the smallest circle for your target voltage to reside. For example, if there are two options in the V AC section, say 200 and 500, you should ideally set the knob at 200.
Put the red multimeter probe on the positive terminal of your amp’s output and hook the black one up to the negative terminal. If the screen reads anything other than zero, repeat step #2 of the process given above.
#5. Start Tweaking Up the Gain Until the Desired Voltage is Achieved
While the test tone is being played at a distortion-less volume level and the multimeter is also connected to the amp’s output terminals, take the screwdriver and start adjusting the amp’s gain knob.
Start by slowly revolving it all the up (most probably, in a clockwise direction) until you reach the point where the multimeter’s dial reads the exact or nearest voltage that you calculated in the first step of the process above.
And that’s it. That’s how to set the gain on an amp with multimeter and achieve the balanced voltage across it.
Verify the Experiment and Redo the Setup
Once you’ve hit that sweet spot of the calibration, hook up all the accessories back to their original spots on the amp and play one of your favorite songs. Make sure there is no distortion or turbulence of any kind but just a crystal-clear lucid melody.
If you still feel some lack, gaps, and deformity in your music or like one or the other is a lot muddy or louder in comparison, try repeating step no. 2 and onwards of the process. You may also want to recheck the amp’s wattage and speaker’s impedance – just to be absolutely sure of everything.
You may also need to delocalize the filters using the multimeter. For instance, lowering the low pass filter (LPF) so that the bass is not overlapped, and adjusting the high pass filter (HPF) so that the high-pitched vocals work out lucid transient.
Again, you need to repeat this whole process individually for each one of your speakers and, of course, their respective amplification sources.
Closing Thoughts
Tuning an amplifier is not only meant to improve the sound quality multifold, but it also helps with the longevity of your components. It prevents your speakers from getting under or overwhelmed and also keeps the amp from overworking.
And knowing how to tune an amp with a multimeter, like how easy it’s done practically, not tuning the amp is more or less a crime.
All it involves is defining the apt output voltage of your amp by taking into account its wattage and the respective speaker’s resistance, and then actually bringing it there by playing the correct frequency and appropriate gain and filters.
Hope the guide helps you big time.