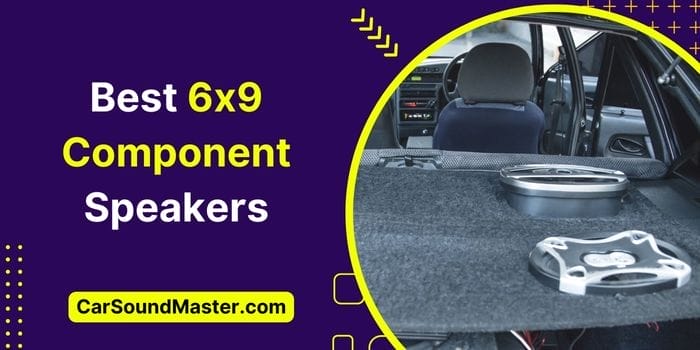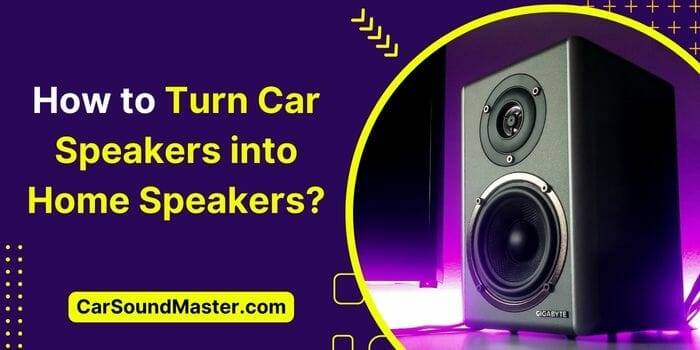
How to Turn Car Speakers into Home Speakers? – A-Z Process
Setting up a great home theatre or upgrading the existing system to one beast mode may require you to break the bank.
However, if you’ve always been a spendthrift kind of baba’s boy, turning your car speakers into home speakers can be one successful way to save some dimes and quarters. The idea, though, is just a budget alternative for some casual listening, so it may not work out your expectations – if you’re a music enthusiast.
See, it’s not only that, “speakers are speakers; they’re intended to work their merry way, no matter what”, it’s so much more that counts here.
For example, you need to consider the change in the balance of things like cabin gain to room gain, speakers’ & amp’s impedance, power output, DC to AC shift, speakers’ make & design, etc.
Only if you’ve all these things in touch, you can successfully install your car speakers out of there and into your home theatre. But before I teach you how to turn car speakers into home speakers, let’s first learn a few other basic things.
Can You Replace Car Speakers at Home? Are Car Speakers Any Replacement of HT Speakers?
Well, the answer to this question is, perhaps, a big “NO” anytime, no matter who you ask. There are a lot of things that work well for car speakers only in cars compared to when the same speakers are used in a home theatre.
Here are some of them discussed in detail.
Varied Transfer Function (Or Cabin Gain) Effect
The speakers installed in your car might be the breathtakingly best ones for their perfect throw of frequencies, deep bass, and overall performance; they won’t demonstrate the same class of performance once brought home.
The only reason for this is the difference in their operating space. While in the car, you feel the absolute immersion just because of the small cabin space where the long pressure-put bass waves and related notes easily build up.
Plus, due to the smaller space, all the high-frequency notes get filtered out leaving behind only low-frequency bass. This translates into the phenomenon of a car cabin being easily pressurized and thus you feel deep bass in its truest form.
Whereas, because a house setup is always going to be bigger than a vehicle, there will be no cluster of low-frequency bass notes only (but a mix of highs & lows) as well as low space pressure.
This overall phenomenon of frequency notes with smaller wavelengths that perfectly fit a space and the increase in deeper bass when that frequency range is reached is called cabin gain. The smaller the space, the higher the cabin gain which ultimately makes for a superbly deep and low bass.
Design, Make, and Placement of Car Speakers
We all know, that there are mostly two types of speakers installed on vehicles i.e. coaxial and component speakers. Though component speakers can also not even stroll around some popular central channel drivers in a house’s surround sound setup, coaxials are far from good enough to be used at home theatres.
Coaxial (or full-range) can be both 2-way as well as 3-way speakers. 2-way speakers pack two drivers only i.e. a woofer and a tweeter, whereas 3-way speakers have three i.e. a midrange driver as well in addition to the other two.
Apart from that, car speakers are built for rugged and harsh environments with higher endurance to the surrounding fluctuations like that in temperatures, hits & bruises, moisture, and more.
Whereas speakers built for home theatres are, kind of, fancy because they are meant to be kept in one place for longer terms without such threats.
Finally, it comes down to the placement of speakers in the car. So, sitting at a calculated reach and angle to each seat in such a small space, a vehicle’s speakers can easily flaunt a perfect flow of sound notes compared to that in larger spaces (as already described in the previous section).
Technical Build – Impedance, Wattage, Voltage …
Last but not least, car speakers are rated for lower impedance than any common home theatre speaker. For example, the maximum impedance of a car’s speaker(s) can be no more than 4 Ohms, whereas you’d find home speakers with much higher impedance ratings – even up to 16 Ohms.
The reason for such a fragile resistance capacity of a car’s speakers is obvious – the amp that powers these speakers (is also rated for lower impedance) is powered through a DC source i.e. the vehicle’s battery.
See, the maximum voltage output that a car’s amp receives is between 12 to 14 volts unlike the AC output of 110 to 120V (in most of the U.S). Now, because the amp is designed to draw a lower voltage yet output high amperage, the car speakers are rated at lower load resistance.
In contrast, home speakers are powered through amps/receivers that run on AC voltage. As these amps input higher voltage, they are rated for higher impedance, and so are the home speakers as well.
How to Turn Car Speakers into Home Speakers?
With all that’s just been said, it’s obvious that you can’t just straightaway turn your car speakers into home speakers unless you do it right through all these challenges. But let me suppose you’ve caught up with all the things.
So let’s finally practice some engineering now.

#1. Make Sure You Have All the Required Tools and Components
First thing first, make a list and get a hold of all the gears and gimmicks you’ll require all along this lengthy project. For example:
- Your car speakers, of course – the topmost thing.
- Get a car amplifier; if you can get a car stereo head unit with an inbuilt amp – perfect!
- An AC to DC rectifier – a 12V Power Supply Unit (PSU).
- Connection wires – look for the manufacturer’s recommendation in this regard. But any wire between 12 to 16-gauge range can do for all the speakers and subwoofers, etc.
- An RCA cable – perhaps, you later need to connect the amp to an A/V receiver.
- A 3.5mm headphone jack to RCA adapter or Bluetooth to RCA converter – only to connect your smartphone/laptop/PC/tablet to the car amp, if you want to.
- Other compulsory minors, for example, a switch, an insulation tape, spade, stripper, crimper, heat sink, etc.
#2. Check Through and Try to Match Your Car’s Speakers’ Impedance with Home Amp
As a general rule of thumb, your speakers’ collective impedance should always exceed or at least match your amp’s nominal impedance rating; it should never be less than that.
Ideally, your car speakers should work at full throttle only if connected to a car amp. But if you’re on a tight budget, you can try your pre-owned home speakers’ amp.
For that, here’s what you need to do:
- Firstly, check the tech details of your existing amp/receiver.
- Make sure it’s not rated for too high an impedance and that it can power your car speakers without any threat element involved.
- Suppose the amp is rated for 4 Ohms, you should now check your car speakers’ details and if all is found well, go with the connection.
- Say, if your (pre-owned home system’s) amp is rated for 8 Ohms or higher, do some matching and try the series wiring method.
I hope you already know about the two wiring methods (i.e. parallel and series) and how both of these methods affect the speakers’ and amp’s impedance match-up. But if you don’t know, go and read “Wiring Speakers in Series Vs Parallel” or “Wiring 8 Speakers to a 4-Channel Amp”.
- As we know, series wiring sums up all the impedances, calculate if you can wire your car speakers and make their overall impedance exceed or match that of the amp.
- If yes, go with the series wiring method: Connect the + of your first speaker to the + of your amp’s channel > wire the – of that speaker to the + of another one > repeat step 2 until the last speaker is connected to the 2nd last > finally, attach the minus of the last speaker back to the minus of the amp’s channel.
- Remember, this method may help you with some bucks, but the speakers will sound really poor in the end.
So the better option always is going for the kill. That’s why, I hope you have already purchased a car amp.
P.S. If you’re thinking about where to find the impedance rating and other tech details on your speakers or amp, let me tell you that you can find it all on the manufacturer’s label on the, maybe, back of your components. If no label is found, you can search these details on the internet using your gadgets’ model numbers.
#3. Get a Car Amplifier
A car amplifier is the most important component in a setup of such kind. When used outside the vehicle, your car speakers can pour their hearts out only if/when connected to their compatible amp.
Although car amps are primarily designed for this sole function, you can still stroll around the market and get one that’s rated for the lowest impedance yet is powerful enough to throw high-definition sound notes.
You can also go with a head unit that has a built-in amp in it. I’ve explained setting up car speakers into home speakers using a car’s head unit (instead of a standalone amp) later in the next section.
That said, I suggest you learn in detail about class A, B C, AB, and D amplifiers and then get the one best suited to your taste.
Generally, class D is the highly recommended amp for subwoofers due to their high efficiency, whereas class AB, perhaps, makes for a high-fidelity audio system courtesy of its excellence for mids and highs.
#4. Set the Car Amp – Let the Installation Process Begin
You already know that a car amp is powered through a 12V DC source, whereas all the plugs in your walls give out AC voltage of 110 to 120 volts. This is where an AC-to-DC rectifier comes into play.
Determine the Tech Details and Learn What Type of PSU You Need
Suppose you already have an AC-to-DC converter at home. To make sure that it can power as well as sustain the amp’s current draw, you need to do a bit of math.
The following calculations may also be required if you plan to buy a new PSU and don’t know how to make the best fit.
- Find out what’s the wattage rating of your car’s amp.
- Divide its wattage/power rating on its voltage draw – a car’s amp runs on 12V DC, remember?
- Say, the amp is rated at 500 watts, thus: 500/12 = 41.67 amps.
- This means you need a PSU that should output around 42 amps to power and sustain the amplifier’s current trail.
- But wait… that’s not the PSU you need…
Your final purchase decision still also depends a lot on what class of amplifier you have.
For example, the most efficient amp out there is a class D amp with up to 90% work efficiency, whereas others may have work efficiency as low as 50%. This means you’ve got a lot of power running at a loss (in the form of heat, maybe) all the time.
So you’ve to take that into account as well. The easiest way to do that is to determine how much it takes for each class of amp to reach its peak performance.
Say, for instance, if the most efficient class of amp draws 1.1%, the rated power and the least efficient of them all sips 1.7% of it to reach its resonant frequency, you should calculate the maximum power draw of your amp.
For that: 500 * 1.1 = 550 watts and 500 * 1.7 = 850 watts.
Now divide the new values (i.e. the maximum power required) again by voltage.
So, 550 / 12 = 45.83 and 850 / 12 = 70.83 watts.
This gives an idea anent deciding on what PSU to get. Like, for the hypothetical amplifier in this example, we see that the max current draw of the most efficient driver is around 46 amps, whereas that for the least efficient one is around 71 amps.
You got it, right?
The PSU that you need, in this hypothetical scenario, is the one that can output at least around or over 50 amps on its 12V voltage line – as we just need its 12V rail and not the others.
What About the X-box Power Supply for a Car Sound Set?
As already described, you need to work out your plans for a PSU and decide on getting one that not only power but sustain the maximum current needs of your amp.
But, if for any reason, you can’t find the desired PSU at the moment, Microsoft has got you covered for “how to turn car speakers into home speakers” with its X-box power supply. It’s a brick using a DC Chord that goes directly into the console and from the other end does what’s required off it i.e. powering a car stereo.
Although the X-box power brick won’t cater to your amp’s max current needs as the max it can output is around 16 amps only, it’s still a great alternative if you’re up for just some casual music moments.
Connect the Car Amp to the PSU
Wiring the AC to DC converter to your car amp may seem to be the techiest stage of this engineering journey, but I’m here to help you in detail through it all.
So, let’s briefly understand all the wires found on a typical ATX PSU. The Black wires always go for the GND (i.e. ground – a zero); Red represents +5V; Yellow works for +12V rail; Orange goes for +3.3V rail; White for -5V; Blue for -12V.
Now, here’s how to attach the PSU to the amp:
- First thing first, ensure the PSU isn’t connected and its capacitors are fully discharged.
- Now open up the REM, GND, and +12V connection points on your amplifier.
- Take the PSU, hold its black wires, crimp them to a ring terminal (insulate the connection point with insulation tape), and attach the terminal to the GND (ground) input on your amplifier.
- Repeat the process for yellow wires but run them towards the amp’s +12V input point.
- To make your car amp automatically turn on as soon as the PSU is connected, jump the REM and +12V input points of the amp using a small piece of wire. (Or a manual switch between the REM and 12V leads can also do it.)
- Finally, connect your PSU to the wall and you’ll see your car amp turn on as intended.
P.S. Connecting the X-box power brick to the car amp involves the same steps as in wiring any other PSU. So to attach the X-box brick to your car amp, you can simply follow all these 6 steps.
Connecting a Car Head Unit (Instead of a Standalone Amp) to the PSU
Let me suppose you went for a multifunctional car head unit with a built-in amp rather than for a separate standalone amplifier (the one about which I discussed in heading #4).
Follow the steps given below on how to wire a head unit to the PSU:
- Determine the functions of all differently colored wires – the black on the head unit is again GND; red represents the ignition switch; yellow is the battery lead.
- To make the connection: crimp (or solder) both the red and yellow wire of the head unit together and hook them to the PSU’s yellow wire – the +12V wire.
- The black wires on both the machines will go and join each other.
- Connect the PSU to the AC plug and your head unit will start up.
#5. Connect Your Car Speakers to the Amp or Head Unit – Finalize the Process
Down to the final steps, you now need to simply connect your car speakers to the up-and-running car amplifier or car head unit.
How to Connect Speakers to the Car Amp?
This only requires you to match the polarities on both sides and simply attach the positives and negatives of the speakers to the positive and negative on your amplifier, respectively.
The wire for the connection should be the one recommended by the speakers’ manufacturer – it can be anything between a 12-gauge to a 16-gauge wire.
How to Connect Speakers to a Car Head Unit?
Wiring speakers to a head unit is a little bit tricky compared to wiring them to a car amp. That’s because a car head unit has separate wires for the front and rear speakers, unlike a standalone amp where it’s just about matching the polarities.
The wire circuitry of a car head unit comprises four differently colored, differently designed wires i.e. the white and gray wires are for the front R/L speakers, whereas the green and purple go to the rear R/L (right and left) speakers.
In addition, the solid-colored white, gray, green, and purple wires represent positive polarity (i.e. they meet the plus side of their respective speakers). Whereas, the ribbon-like or striped wire from each pair means negative polarity (i.e. they hook to the minus of their res. speakers).
With these very minute things in mind, here’s how to wire speakers to a head unit:
- The white and gray wires from the car head unit will go to the front right and left speakers, respectively.
- The solid one from both white and gray will join the front R/L speakers on their plus (+) terminals; the striped ones will join them on their minus (-) side.
- Similarly, the green and purple wires from the head unit go to the rear R/L speakers, respectively with the solid ones matching at plus polarity, whereas the striped ones join the speakers on the negative terminal.
That’s how it’s done to set up the entire system.
Do You Plan to Wire a Receiver to the Amp/Head Unit? Let’s Do It
Because an A/V receiver plays the role of a centerpiece to all the signals and ensures that each signal reaches its befitting speaker, it’s an essential component of any home theater system.
Well, to connect the receiver to the amp, first make sure the former has all the pre-out ports (i.e. front, rear, subwoofer, etc.) available. These pre-outs will ultimately be hooked on the amp’s respective inputs via RCA cables.
If in case the receiver lacks the pre-outs, you’ll need to use an RCA converter or a speaker wire to the RCA adapter to make a connection to the amplifier.
Finally, for you to get the max possible power to the amp’s input, you should match your receiver’s output to your amplifier’s voltage gain.
Do You Plan to Control Your Amp or Head Unit Via Phone or Tablet?
You can also connect your head unit or amp to your phone or tablet. The most convenient way to do that is via Bluetooth but if your amp doesn’t support Bluetooth, you need to buy a Bluetooth to RCA converter to enjoy remote media controls and wireless streaming.
Another method to connect the amp to your phone, tablet, or PC is via a headphone jack to RCA adapter. This also applies if your amp doesn’t support a 3.5mm input.
The Finishing Touches – Buy or Build Enclosures for Your Car Speakers
Just like your home speakers, you should always buy or build enclosures for your car speakers as well. This makes their performance good by some noticeable degrees.
Enclosures make sure the out-of-phase notes and frequencies from the front and rear speakers don’t quite mix and cut off each other. Also, enclosures made out of thick (MDF-like) sheets help in absorbing the vibrations created through low-frequency waves helping eliminate the wobbling effects.
Types of Speaker Enclosures
There are so many different types of speaker enclosures with each one affecting the sound quality differently – as one may prefer. But some of the widely known ones include:
- Ported/Bass Reflex enclosures – designed to produce increased bass by allowing waves to escape from a vent/port on the rear side and reverse-phase to stay in phase with the front waves and not cancel them.
- Sealed enclosures – the most common, the easiest to build (DIY), but the least efficient (as the entire rear waves go waste here) of all the enclosure types flaunting an airtight environment around the cone and producing a tight and uniform sound.
- Aperiodic enclosures – where woofer(s) breathes via a thin resistive sheath and dictates its cone work characteristics.
- Bipole enclosures – where two speakers face away from each other and sound is superbly propagated courtesy of countless reflections.
- Infinite Baffle and Bandpass, etc. are the other notable speaker enclosure types.
Ideally, you should always go for the ready-made enclosures and get one that may be the best fit for your suite of speakers. And to determine this, you need to calculate the EBP (Efficiency Bandwidth Product) for each of your drivers.
Calculation EBP requires you to divide your speaker’s free-air resonant freq. (Fs) by its electrical Q rating (Qes). The result can be any natural number – usually between 0 to 100.
EBP less than 50 means the speaker(s) is the best fit for a sealed enclosure; EBP above 100 means you should get a ported enclosure; EBP between 50 to 100 means you can get any one of these two.
This EBP calculation also applies if you want to DIY build your speaker(s) enclosure(s) at home.
Building Enclosure at Home
It may just be tricky and time-consuming, but it is, of course, not possible to not build an enclosure for your car speaker(s) at home.
The T/S Parameter Method
Using the universally-known T/S parameters method, you can determine your speakers’ electrical and mechanical properties, predict the optimal conditions, and accordingly DIY build the perfect enclosure.
This method is primarily focused on building the sealed speaker enclosures. To briefly show you how this method works, here’s a glimpse of the different parameters used and how’s an enclosure prepared via them all.
For a sealed enclosure to be DIY-built, the net internal volume (Vc) needs to be determined first. This (Vc) is calculated using the speaker/driver’s mechanical and electrical damping values – identified by (Qms) and (Qes), respectively.
Qms represents suspension’s damping, whereas Qes means damping by coil-n-magnet assembly. Total damping within the proposed enclosure is represented by Qtc and is always in inverse proportion to the volume.
All these parameters are then computed in a mathematical formulae pattern, and we ultimately get the required net internal volume (Vc).
As a general rule of thumb, a Qtc value that’s below 0.4 means the driver would perform best in a vented/ported/bass reflex type of enclosure. Qtc value of over 0.4 and around 0.7 means the speaker would work best in a sealed enclosure. Whereas, a Qtc value of over 0.7 means the speaker should be operated in a free-air “Infinite Baffle” type of enclosure.
But it’s not any hard and fast rule, and there may be exceptions too, for example, a Qtc value suggesting for one type of enclosure, but the speaker might peak its performance in another enclosure.
Anyways, putting your preferred Qtc in the formula gives you Vc which then helps you determine the dimensions of your enclosure and build it.
Finish Lines
More than enough, I guess? The next time you realize like asking “how to turn car speakers into home speakers”, just come back here and learn the most detailed DIY method to do that.
But I’d again suggest keeping your car speakers in the car (instead of replacing them in your home theatre) as that’s where they perform the best. Maybe, encasing them in proper home speakers-like enclosures can somehow solve their fragile hiss and hums.
Nonetheless, these can only be some cheap budget alternatives for quality HT speakers, and you won’t love them a bit if you’re a genuine music aficionado.